In the ceramics studio where plaster moldmaking is taught and used, there's usually that one person doing experiments with the casting slip. If some material is absorbent, someone has dipped it in slip to burn it out. If it's flexible, someone has tried to capture the form with clay slabs. Here I'm using paper cone forms to get results that are a little of both. Functionally I planned to get a thin cup shape for drinking from, but the results were a little surprising and, possibly, better than I hoped.
THE SET-UP, or WHAT MARC THOUGHT WOULD HAPPEN
I use the traditional plaster mold all the time, but wanted a forming method that lets me cast slip as a thin wall, without the draining step. Such solid castings are common practice for items like plates. But a problem of mold release happens when the intended form becomes too enclosed. The mold surface for the inner part becomes caught in the casting it just made. It is far more common for the interior surfaces of cast items to be drained rather than molded by a rigid object.
This set of cones could allow me to define exactly what shape I want on the interior shape, but avoid much of the problem of using rigid molds. It also allows me to use exactly the amount of slip needed for the cup, without having to drain a heavy mold of the excess. The interior paper form would be easily removable, or, if necessary, could be left in the cup and burned out later.
Turns out I was mostly right. The forms collapsed from the cone shape, but I kept the results. I like the tree-bark like texture better!
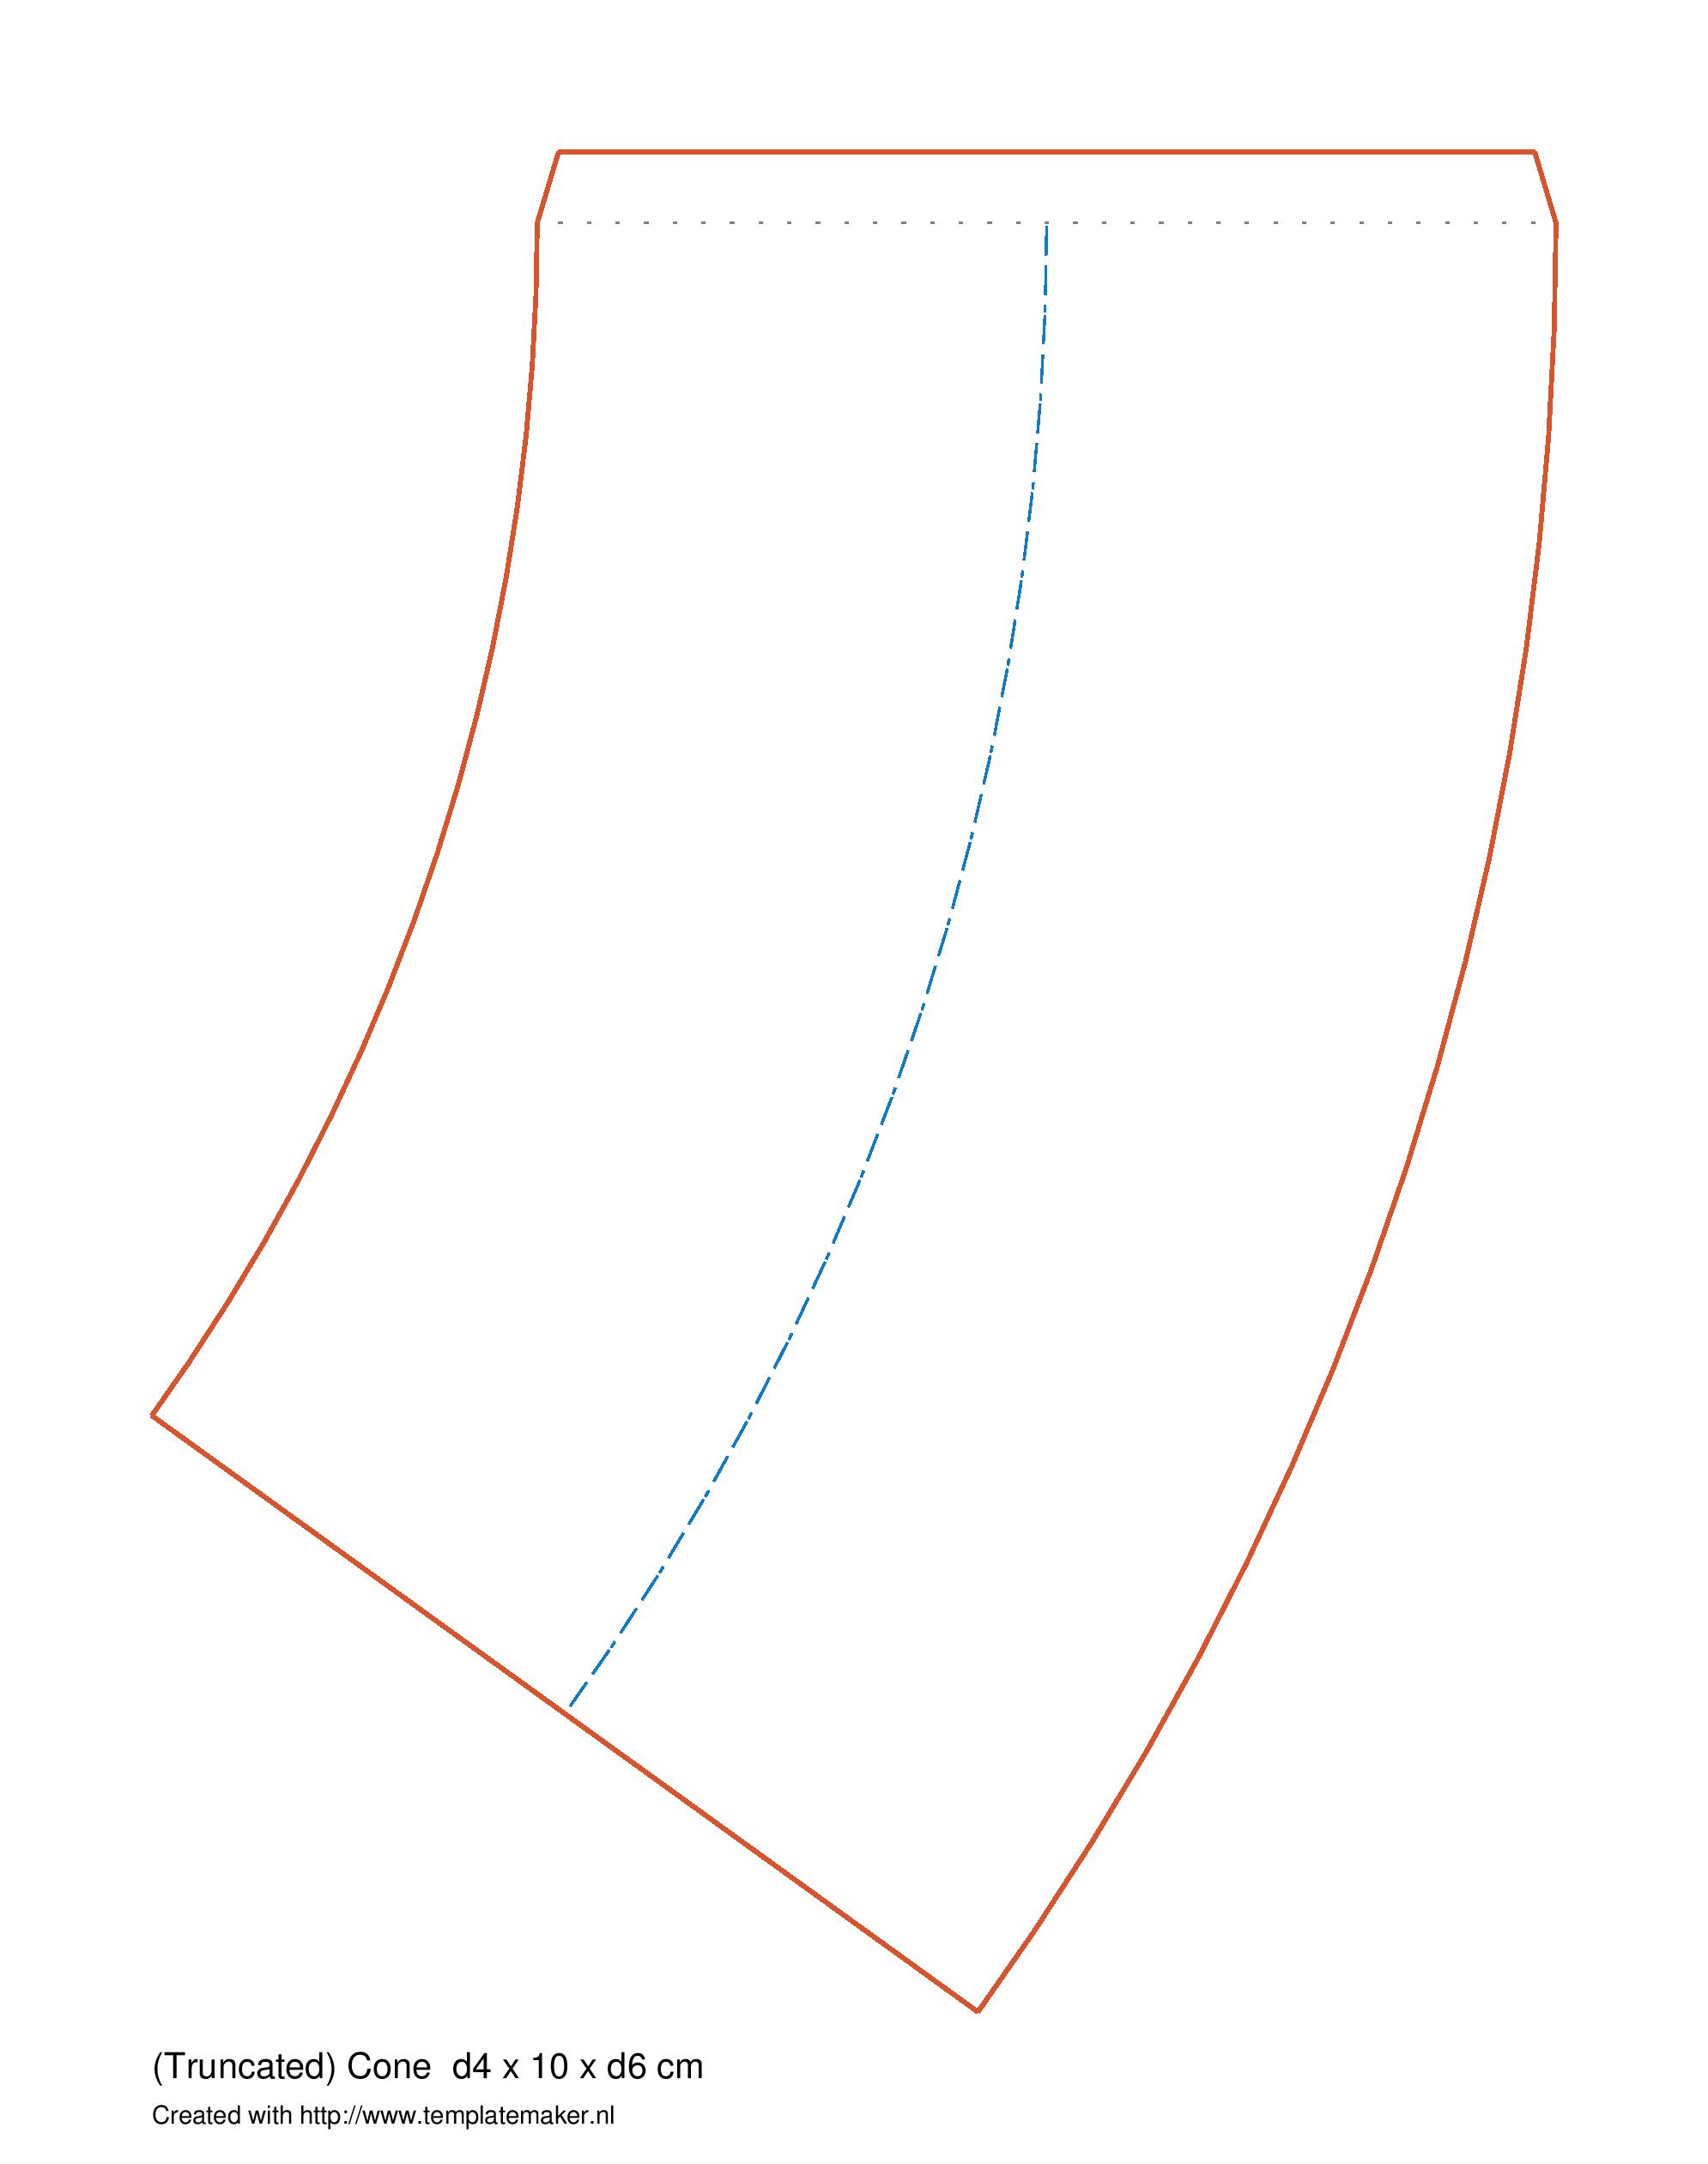
Example template for generating cone pattern. See the website? Follow it for fun templates.
The intuitive way to build cones from paper will usually work if the top and bottom edge don't have to be exactly parallel to each other. But in this case I felt like a template would make things easier. I found a great website that helps. This image is an example of the kind of cone I used for this test.
I made two paper cones by printing the pattern on normal copy paper. My theoretical guess of how much smaller to make the inner cone was a bit off. I set the template for the inner cone and outer cone to have a 3/8 inch gap on all sides. When I taped up the forms, this gap ended up being too small, so I hacked the inner cone to a size I liked better. I used plastic tape used on surfaces that I didn't expect slip to touch, originally to ensure better membrane buildup.
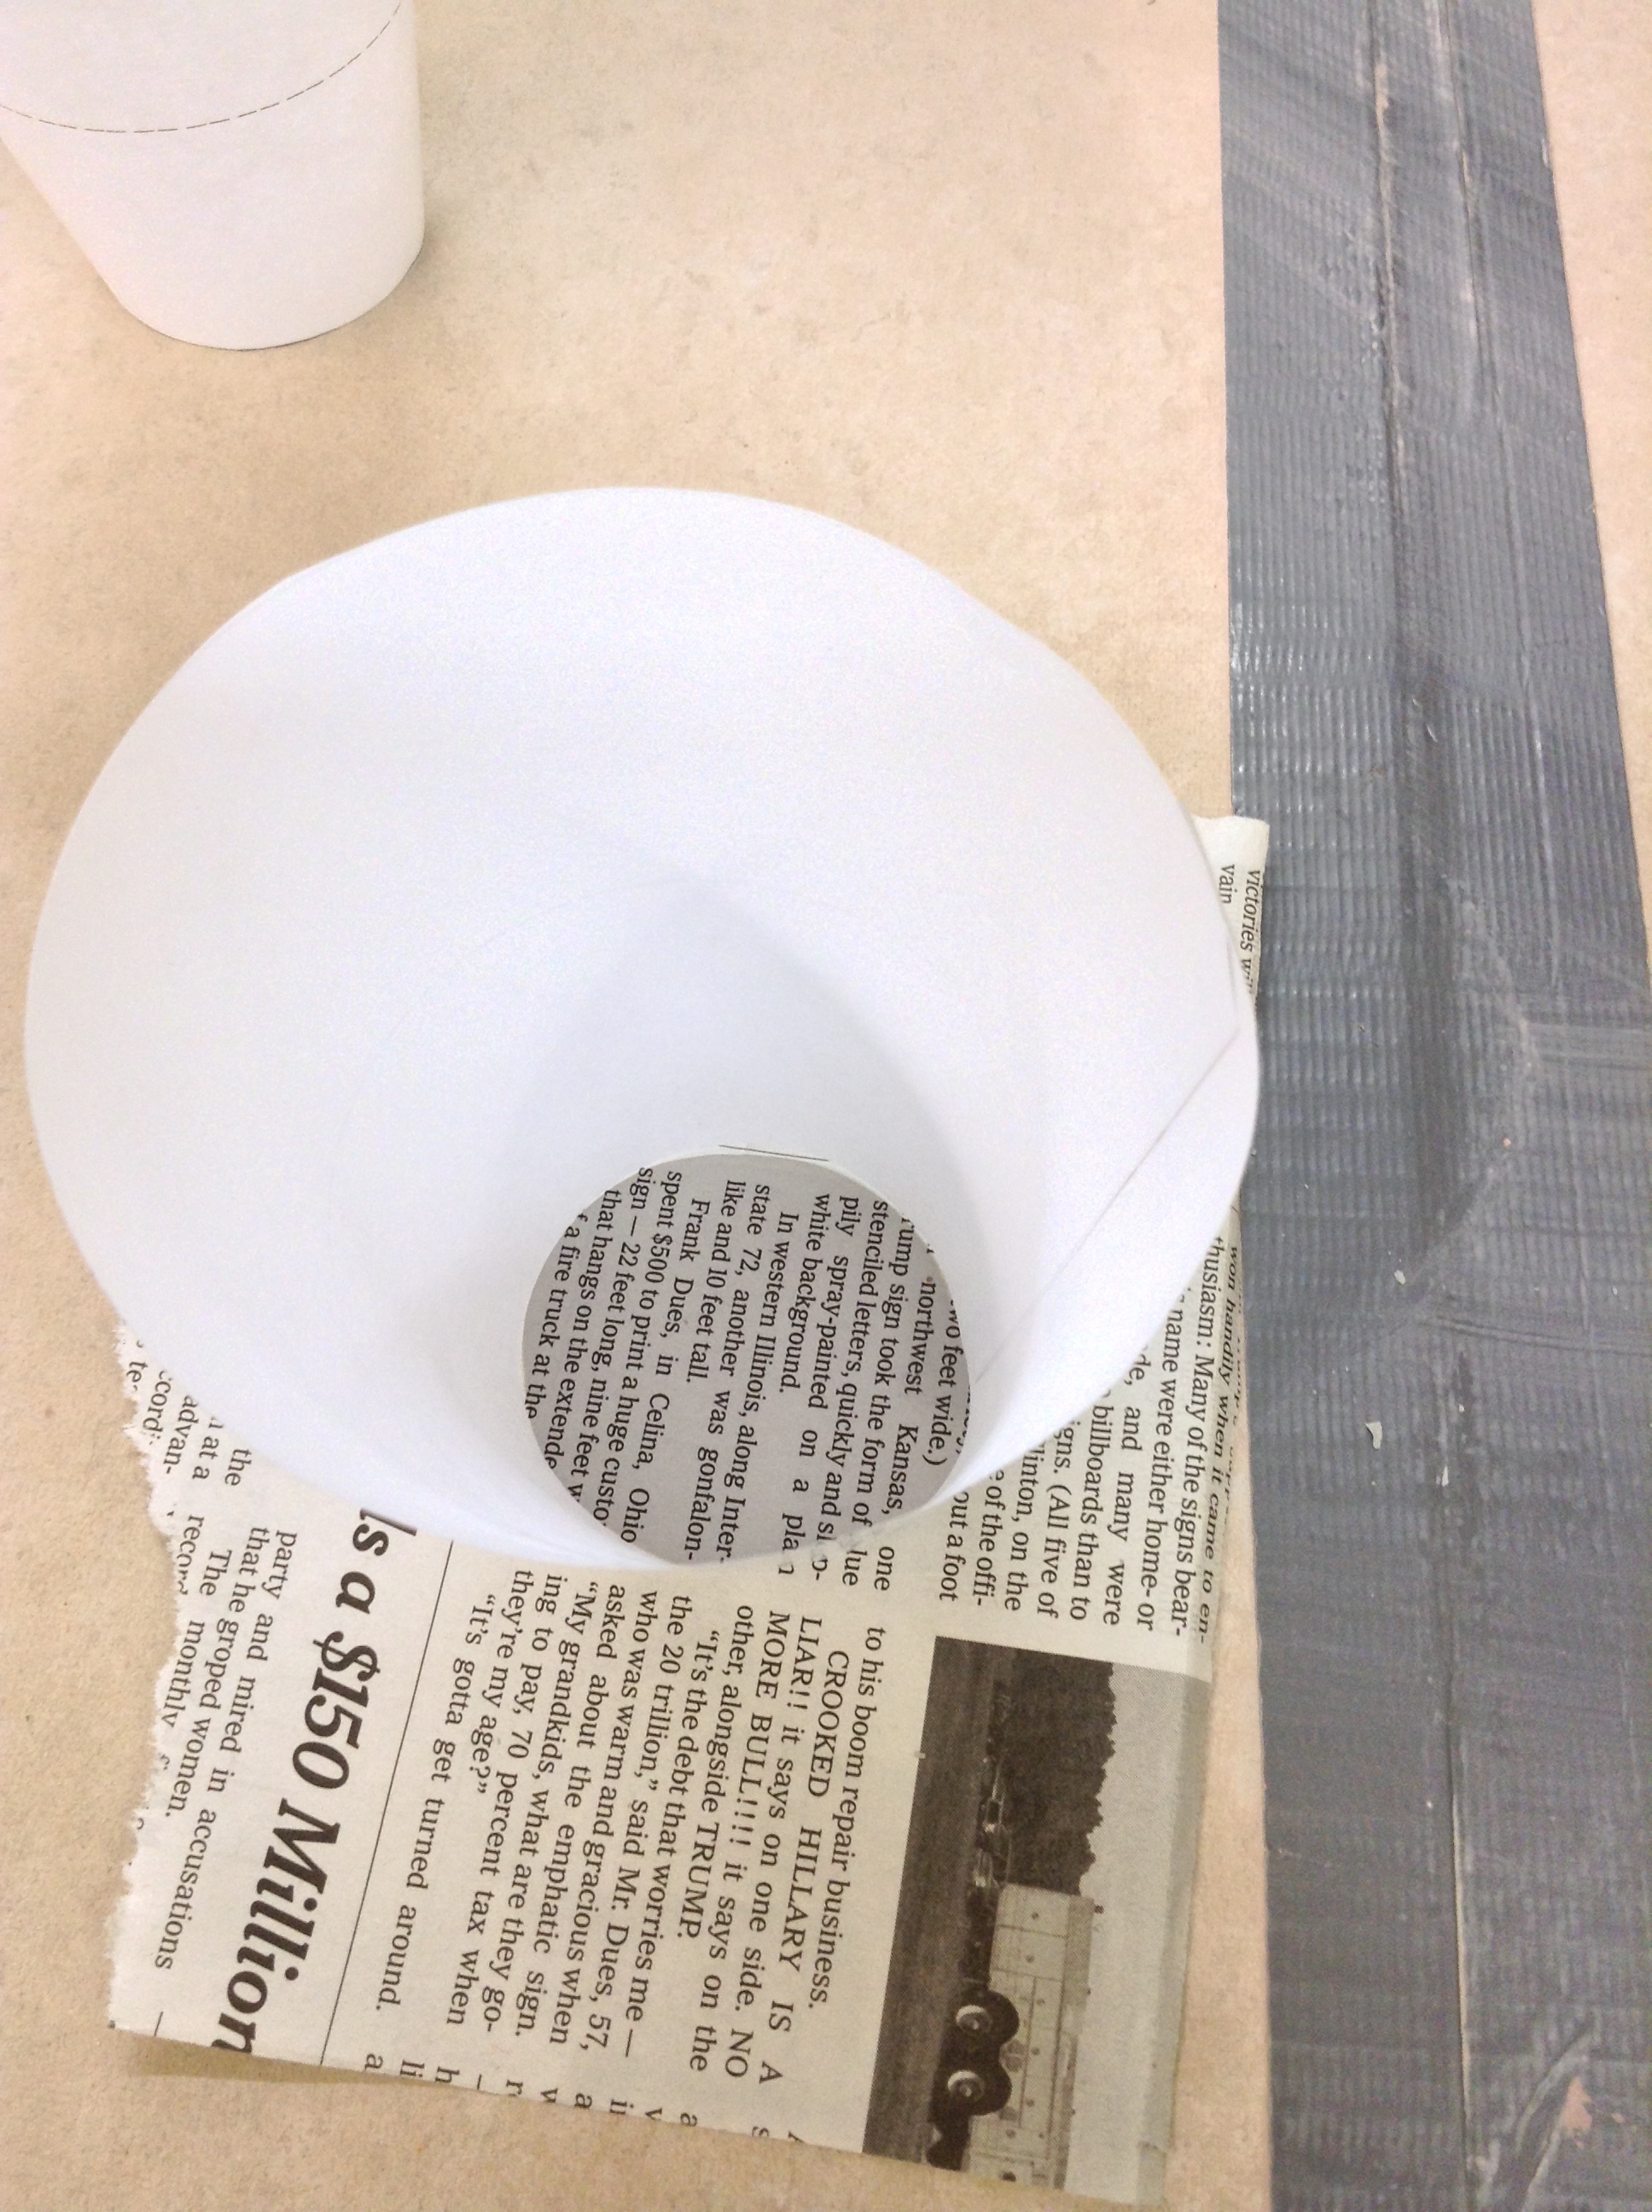
Single paper cone, taped, as outer shell for containing slip.
Here you see the outer paper cone resting on a sheet of newspaper. Choosing two different papers might seem to add unnecessary variation. But it makes sense here.
- The cones needed to be made from copy paper because I used the printer template. In the future I could use the pattern on any type of paper by transferring it. Can I print onto newspaper directly? Not on my boss' printer, I can't :)
- The base needed to be made from newspaper because it releases better from the slip than copy paper does.

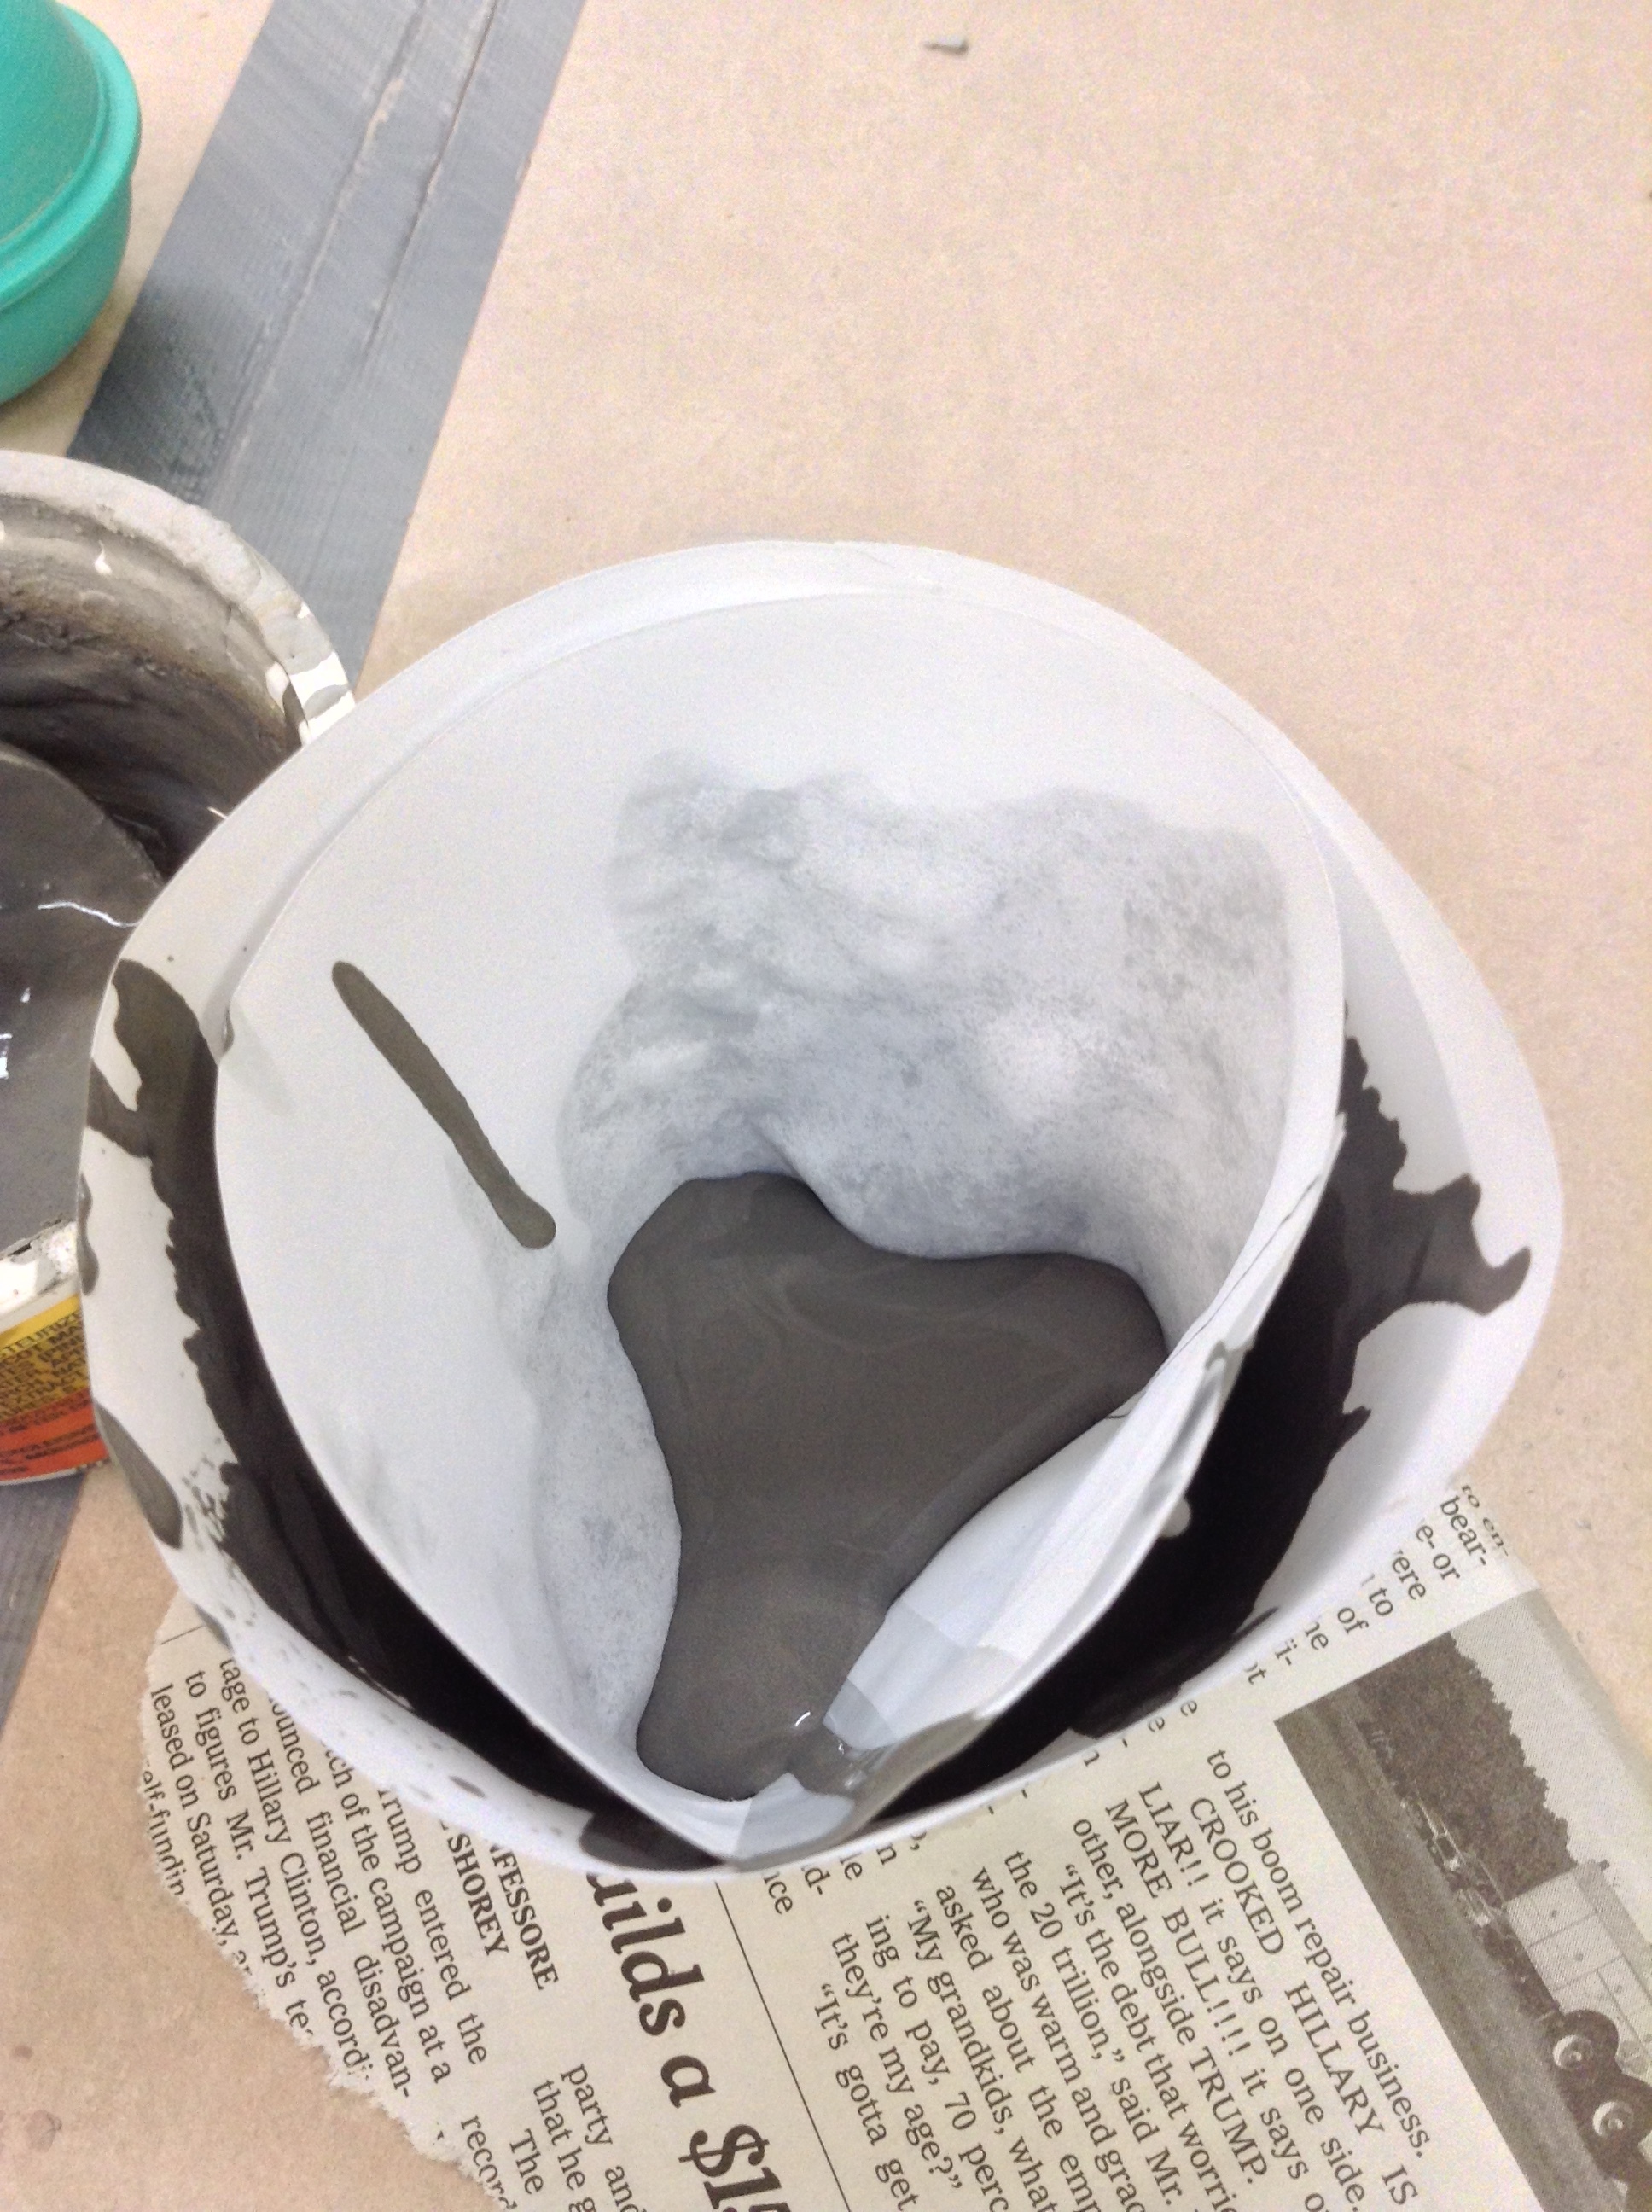
Thick clay slip added sparingly to bottom of cone, with no additional seal between cone and newspaper underneath. Slip hardens slightly on newspaper and forms fragile seal against leaking.
Slip is very, very prone to leaking through tiny gaps. But this way of using slip to seal the gap first is unusual, and it worked. Pouring a thin bottom layer first, it sets up enough that it sealed closed the gap between the outer cone and the newspaper underneath. Would it work for larger amounts of slip? Probably not!
The slip mix has a bit of sand in it for strength. I'm still undecided about the ratios. Half sand, half slip seems like too much sand, so I guesstimated three parts slip to one part sand. This ratio can be adjusted later if need be.

Detail of clay slip visible through translucent paper. No leaking!
Here is a detail image of a small amount of clay slip added to the bottom of the cone. This should leak, but doesn't. The small amount of slip that will be filling the gap between the two cones won't exert too much force (fingers crossed!) The newspaper immediately starts to absorb water from the slip, forming a denser skin to seal the two paper shapes together. If I'd poured more slip into this cone all at once, the gap would certainly have leaked.

Inner paper cone, smaller, with bottom edge sunk into wet floor. Interior circle represents floor after walls are cast. Gap visible between cones creates fill space for slip.
Here the inner cone has been gently lowered down to the level of the very wet slip. The gap between the two cones was roughly estimated by hand, sliding the inner cone smaller before taping it closed. The template maker has settings to change the diameter of the upper and lower circles. I chose an inner cone measurement 1/4" smaller, thinking it would give me the wall thickness I intended, but it was theoretical, and not practical. The inner cone was very nearly exactly the same size as the outer! So I improvised..
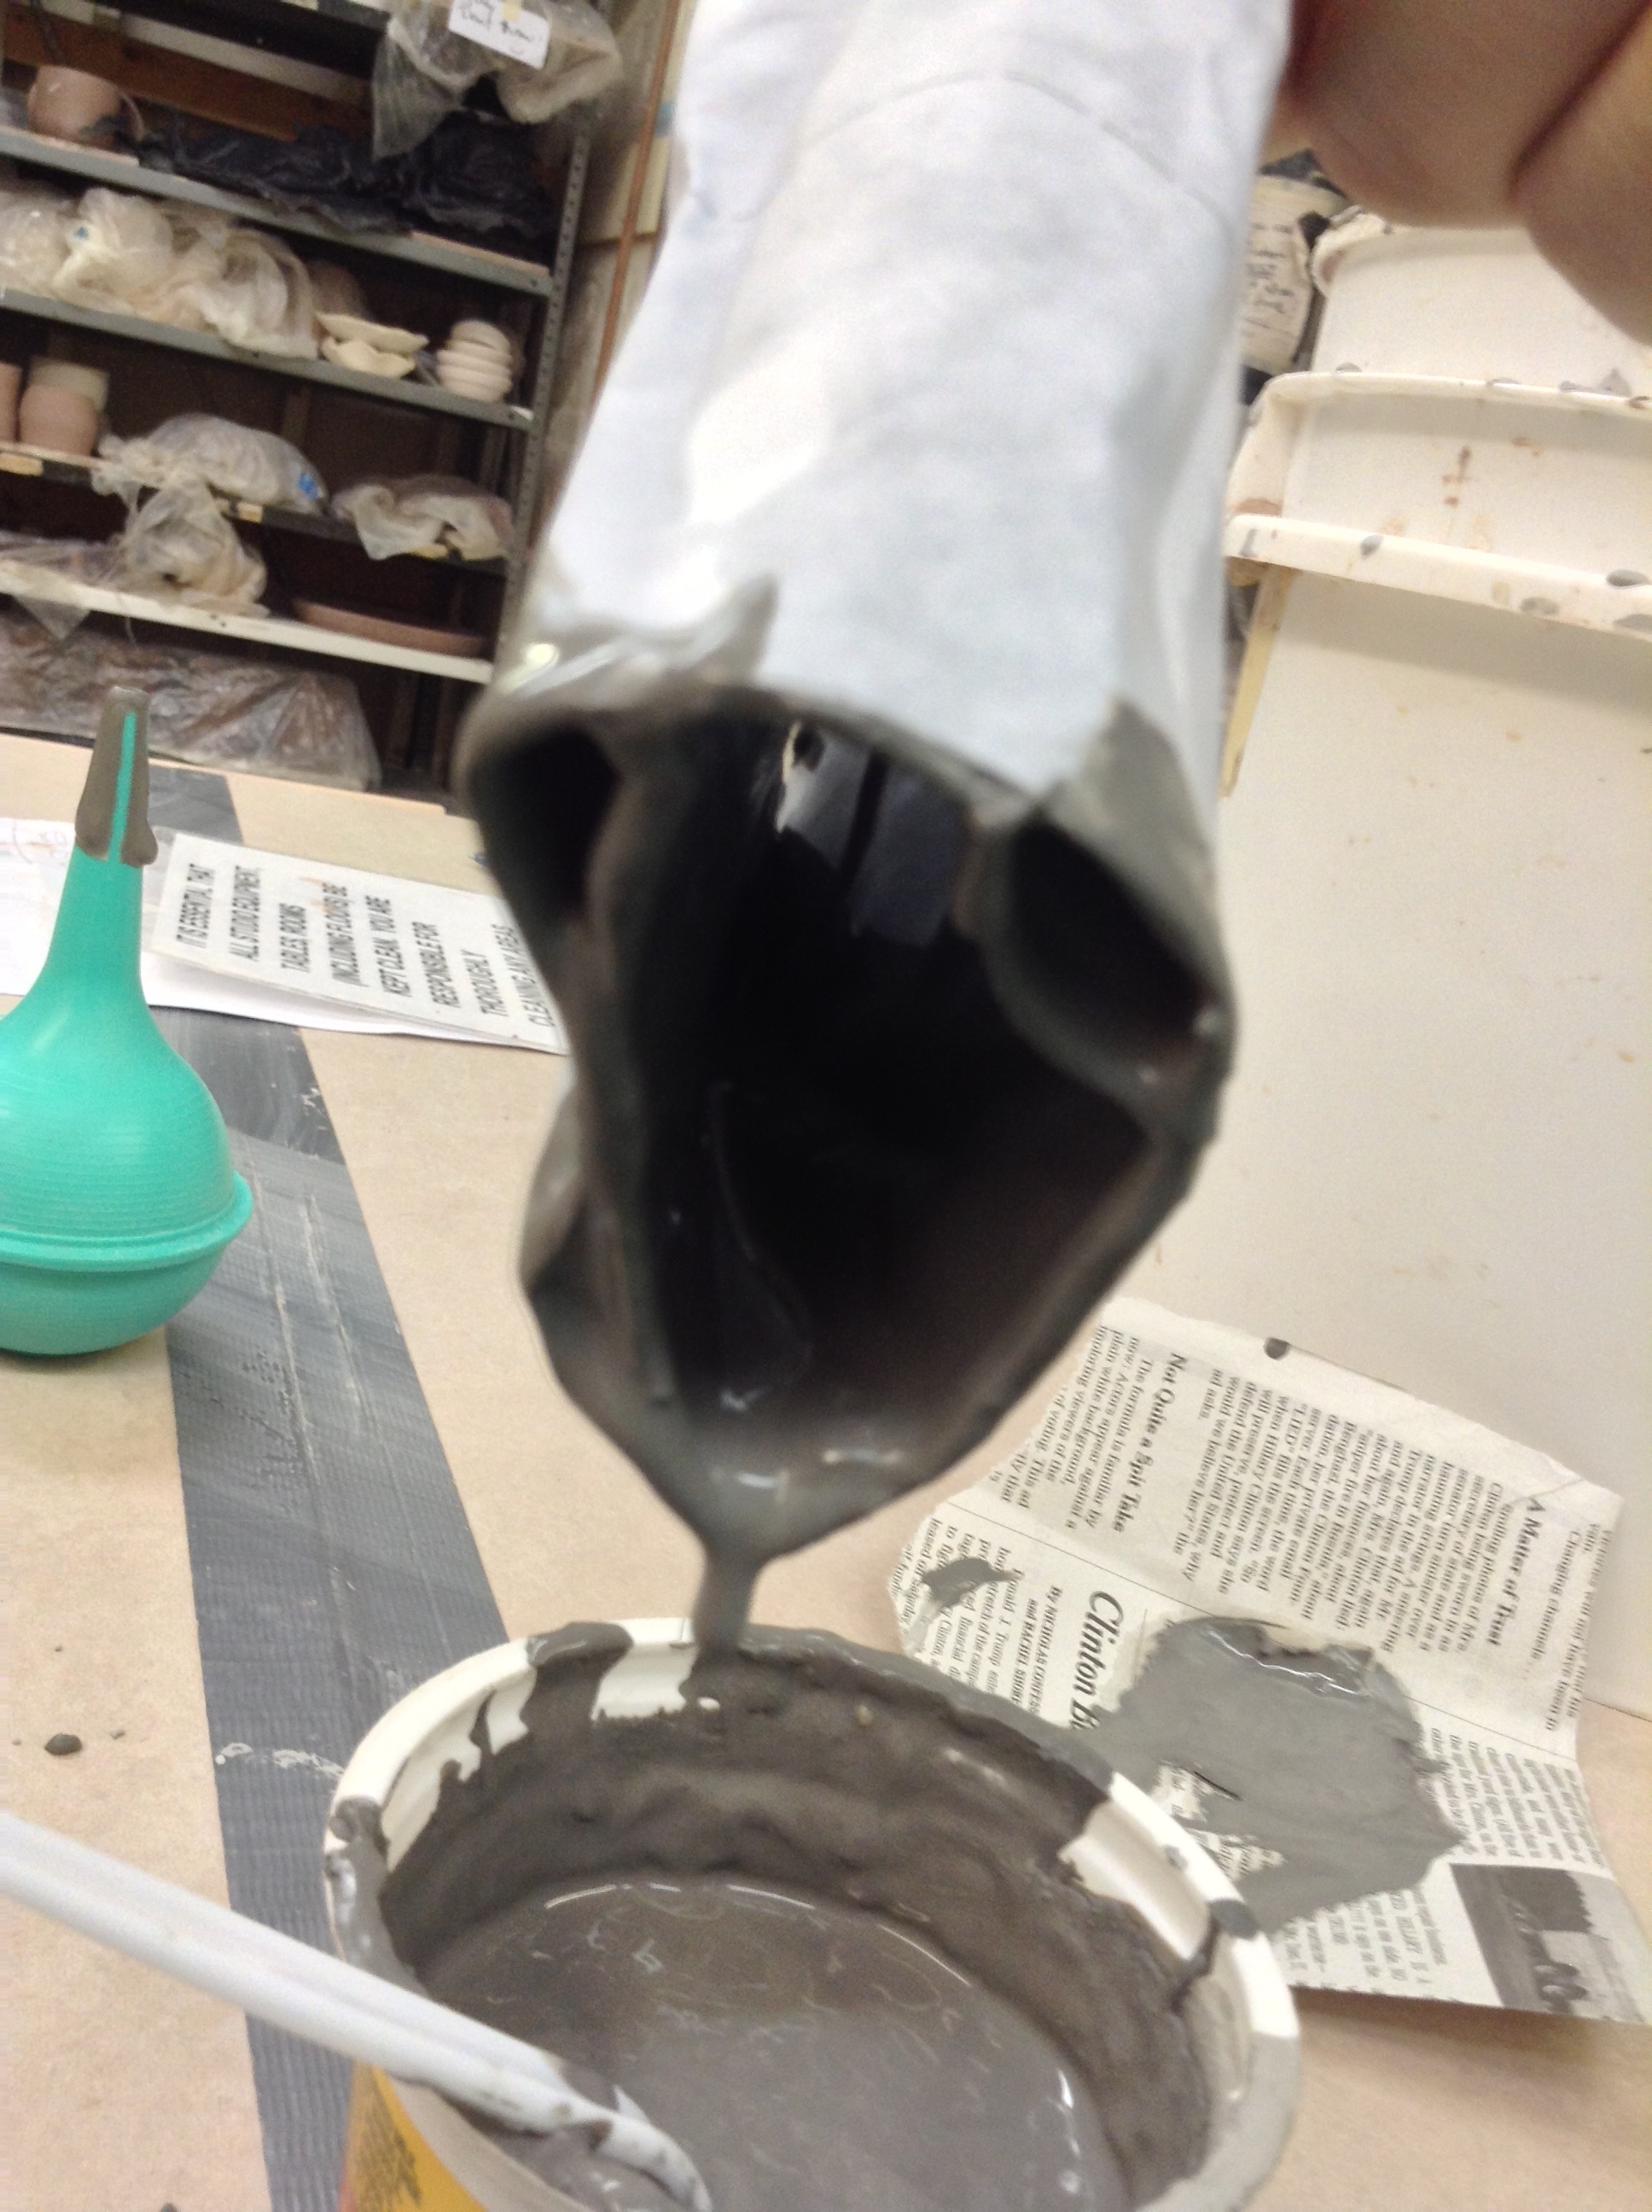
After a little pouring, both paper cones soften. Inner cone folds upwards as simple seal fails and leaks wall slip into interior space.
OOOPS! Lots of activity to see here. As I added liquid slip to the gap, it became clear that the stiffening trick that helped prevent leaks out of the outer ring, were not helping with leaks toward the inside of the form. The paper softened as I knew it would, but it also lifted up and let lots of slip into the interior. Suddenly I get a mold that needs to be drained!
Is there a way to toughen the seal of the inner cone like the outer cone had? Maybe. I could have stiffened up the clay by leaving it longer, or by forcing it dry with a heat gun or hair dryer, but I didn't have either of these things handy. Again, I improvised and realized I might like the distortions. I continued filling the gap, allowed leaks, and rearranged the paper edges.

Collapsed form raised off of table and held.
After I filled and distorted the cones, I felt should hold it by one of the edges. Aside from the artistic guess, technically I felt that there was far too much clay in the form to survive in the kiln without cracking that was going to be uninteresting cracking. To drain the form, I pulled the cones up from the newspaper bottom. This caused the layers to drain and collapse. The hole revealed by the newspaper can be seen.
Blurry: sorry. Bottom edges of both cones, showing slip draining from interiors.

Detail view of self-supporting collapsed cones, back on new newspaper sheet. New slip poured into bottom of collapsed structure (not visible) that clings to newspaper will form new bottom.
Looking at the form closely, the different thicknesses became very interesting to me! I had not planned to make hollow forms, but this could be a good way to do it intentionally.
Here I got lucky about the bottom: When the collapsed form still had a flat enough bottom edge to continue to stand up under its own weight, I decided to put it back on a fresh sheet of newspaper, and re-pour a bottom layer inside. This technique might be a good way to make watertight forms, like planters, even if the form is quite distorted.

Detail of collapsed form during drying, showing great variety of wall thickness, ranging from 1mm-15mm.

Luckily, collapsed form can still support its own weight.
I especially want to set up these crumpled forms with as wide a variation as possible between thinnest and thickest wall areas. Generally, we avoid great differences because it can make a clay object crack, but in this case, cracks might be appealing.

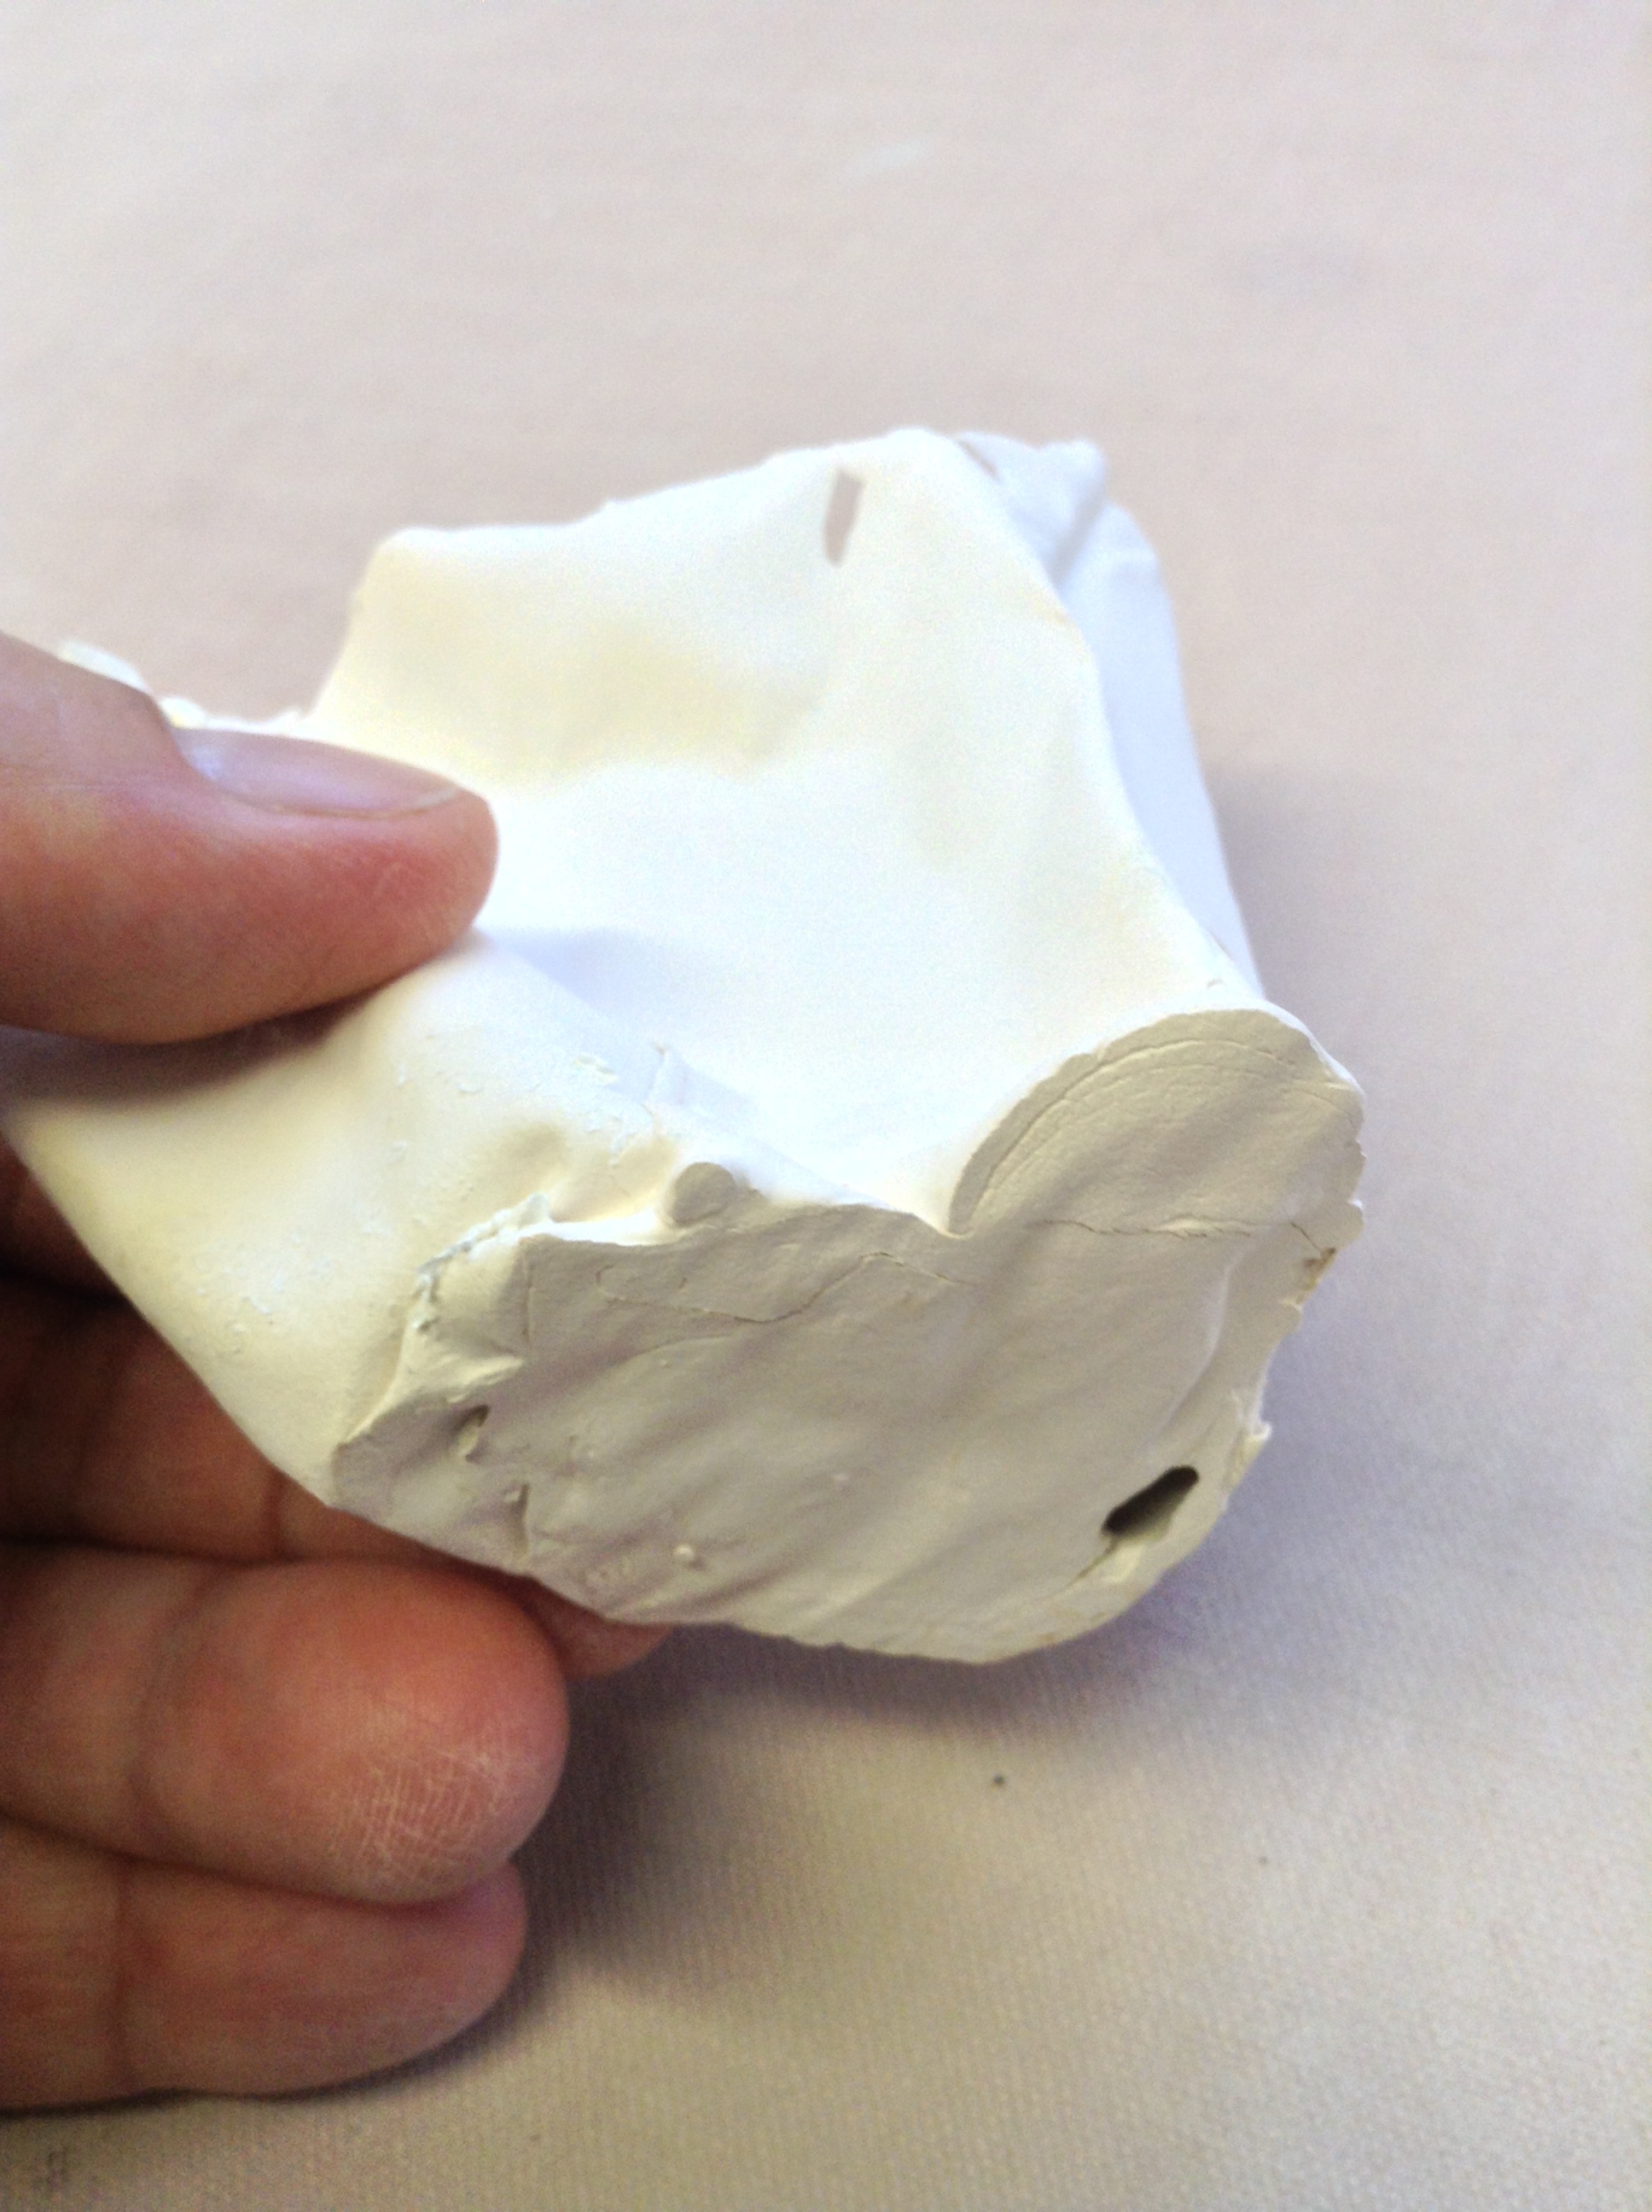
Profile view of fired structure.
After burnout, the grey raw clay has been transformed into its white final color, the paper has all burned off. I'm left with a lot of detail that is interesting. A great deal of the form, especially the edges, is fragile. Interestingly, a coating of glaze might make things a little stronger. But do I want to add a shiny coating? Maybe, maybe not.
Bottom layer created by pouring slip into collapsed form while balanced on newspaper. Hole is accident, but interesting!
This view of the bottom shows the intact surface (ignoring the hole, of course.) In the context of ceramics, this connection method isn't too rare. But pouring clay with time delays between pours is more commonly used in molds, where the form is completely supported, and also involves surface colors, rather than structural walls. The fact here that the two layers are structural will lead to more experimenting with delays between pours in more elaborate shapes.
Close view of the many surfaces and drips that happened. I see this process ending up as planters, textural pieces mounted behind glass, many organic things.

Interior detail of layers, showing drips and tatters of ash, not yet washed away.

Interior detail of many layers and thin edges.
WHAT'S NEXT?
I like this shape, but I think it would be very interesting if there were more of them. It is very easy to make the paper cones wider or shorter, and arrange the different heights in some pleasing way. The resulting shapes could be mounted in a glass-covered frame like a delicate fragment of nature.
The slip can be colored, of course. And I could glaze these forms by spraying or dipping.
I'm looking forward to making more paper shapes and using them to get these abstract organic forms. I hadn't planned on the cones getting so distorted, but that led me to the idea of making things like the drawing below. The amount of detail is probably my favorite aspect of this process.
It looks like my shipment of more white slip and brick red slip has just arrived. So I have to go try more things immediately.....

Drawing of sculptural application using several slip forms made in the manner discussed. Coral reef? Flower? Surely, nothing that was man-made.